2 Getting Started
This chapter is a hands-on primer for getting productive with Hugging Face, focusing on a clean, reproducible Python setup and the tools you’ll use throughout the book. It emphasizes working in Jupyter Notebook for interactive exploration, managing dependencies with Anaconda and conda, and taking advantage of hardware acceleration when available. You also learn how to connect to the Hugging Face Hub so you can fetch models and assets programmatically and work both online and offline.
You begin by installing Anaconda, creating and activating an isolated conda environment, and launching Jupyter from a dedicated project folder. With the environment ready, you install the transformers library and, if you have a compatible GPU, set up PyTorch with CUDA (or use Apple’s MPS on Apple Silicon) to accelerate inference and training. The chapter shows how to verify GPU availability with PyTorch and inspect device details with GPUtil, then demonstrates directing transformers pipelines to the right device and even auto-selecting between CUDA, MPS, and CPU for seamless performance.
Finally, the chapter introduces the huggingface_hub package for interacting with the Hugging Face Hub from code and the command line. You learn to download specific model files (including pinned revisions), manage repositories, and authenticate securely using access tokens via the CLI or directly in Python. With these environment, acceleration, and Hub workflows in place, you’re equipped to run examples efficiently, manage dependencies safely, and integrate models and datasets into your projects with minimal friction.
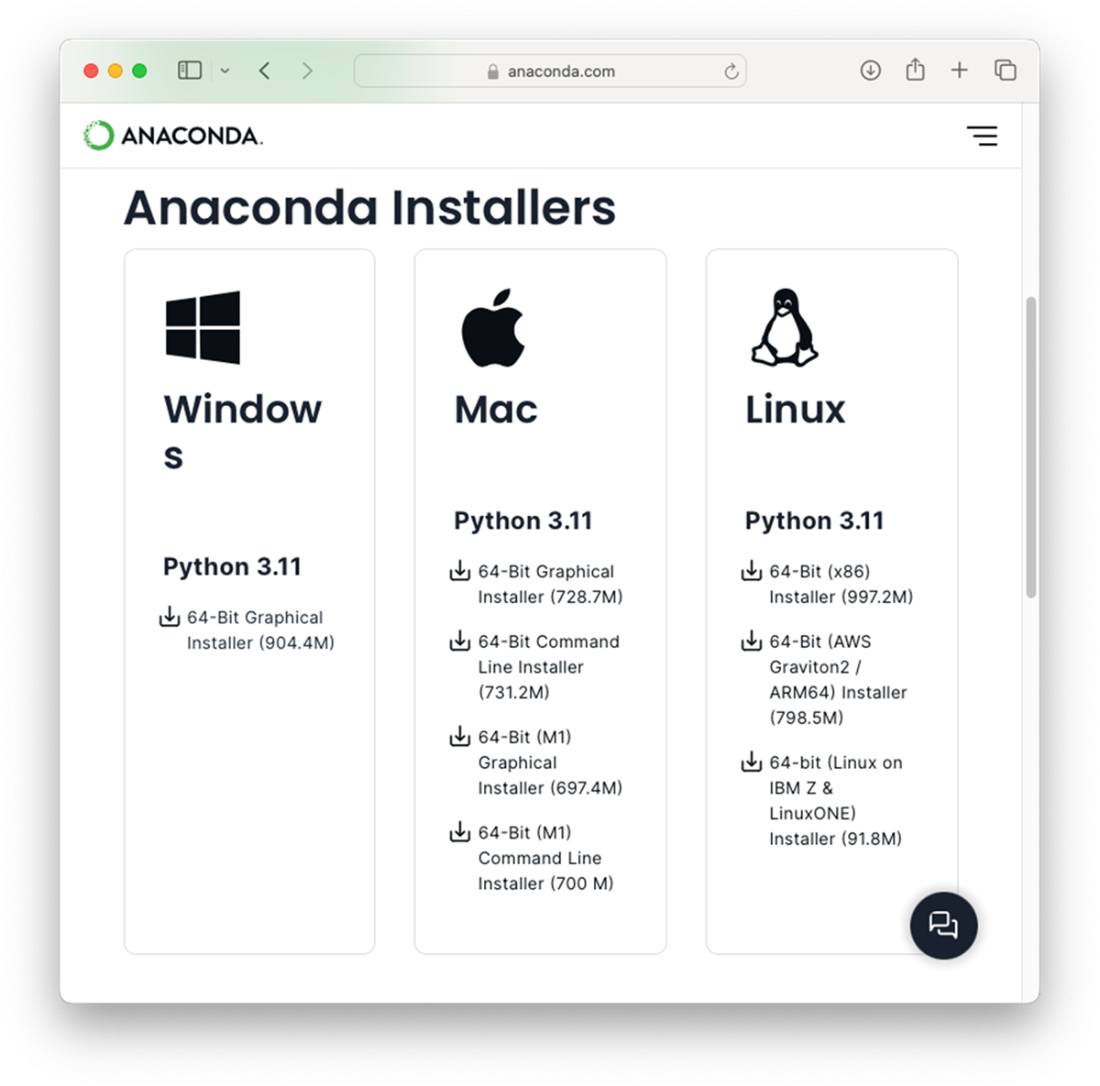
Downloading Anaconda for the three major platforms – Windows, Mac, and Linux
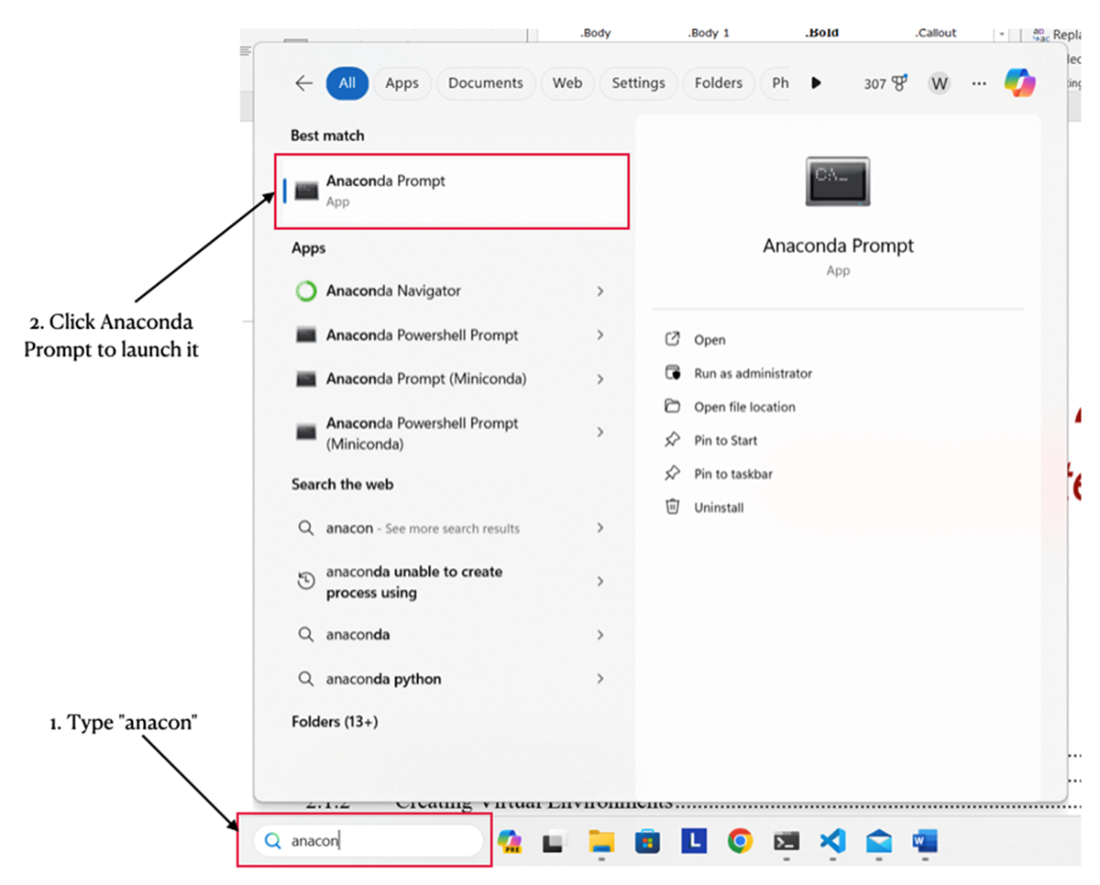
Launching the Anaconda Prompt in Windows
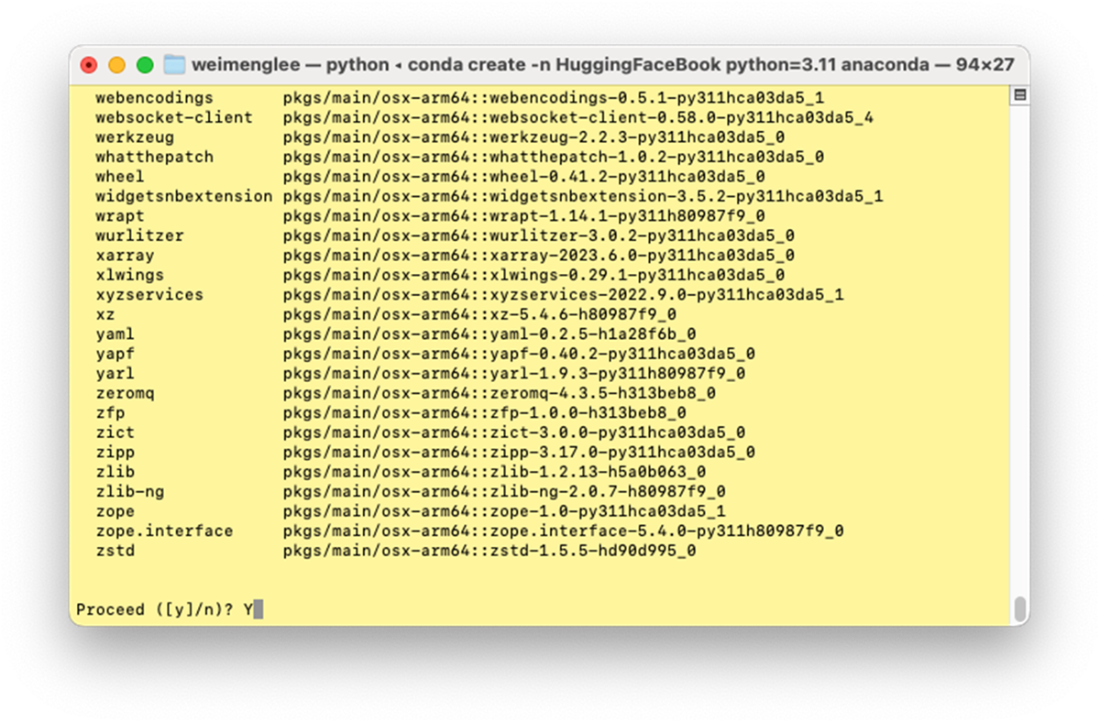
Creating a new virtual environment and installing all the required packages
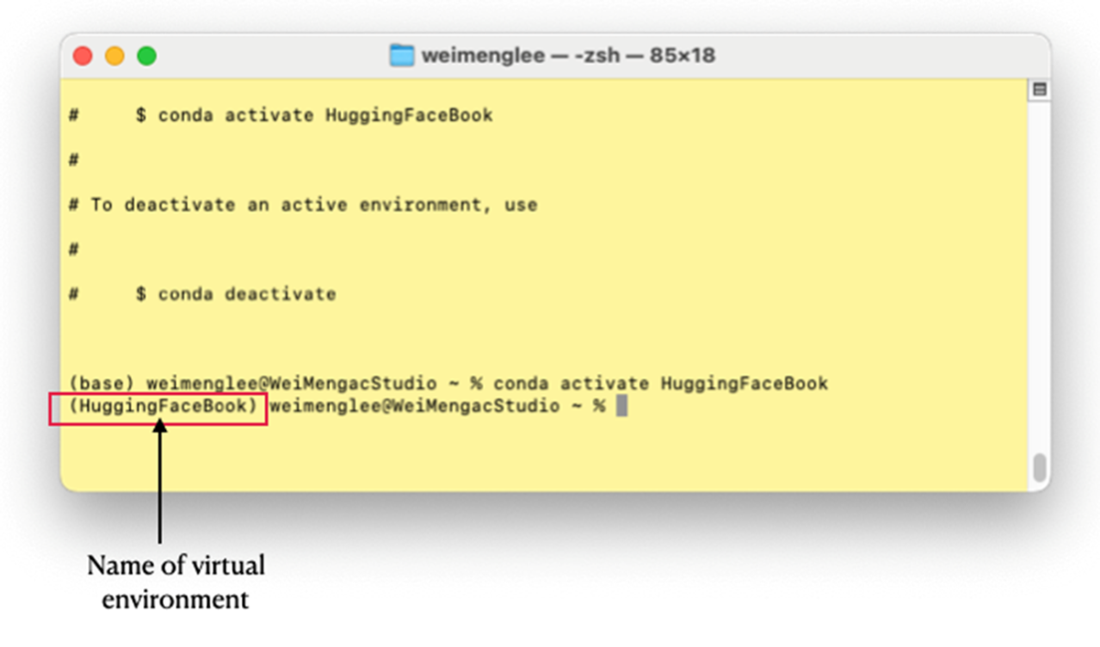
The virtual environment name will prefix the prompt
The web browser will now display the Jupyter Notebook’s main page

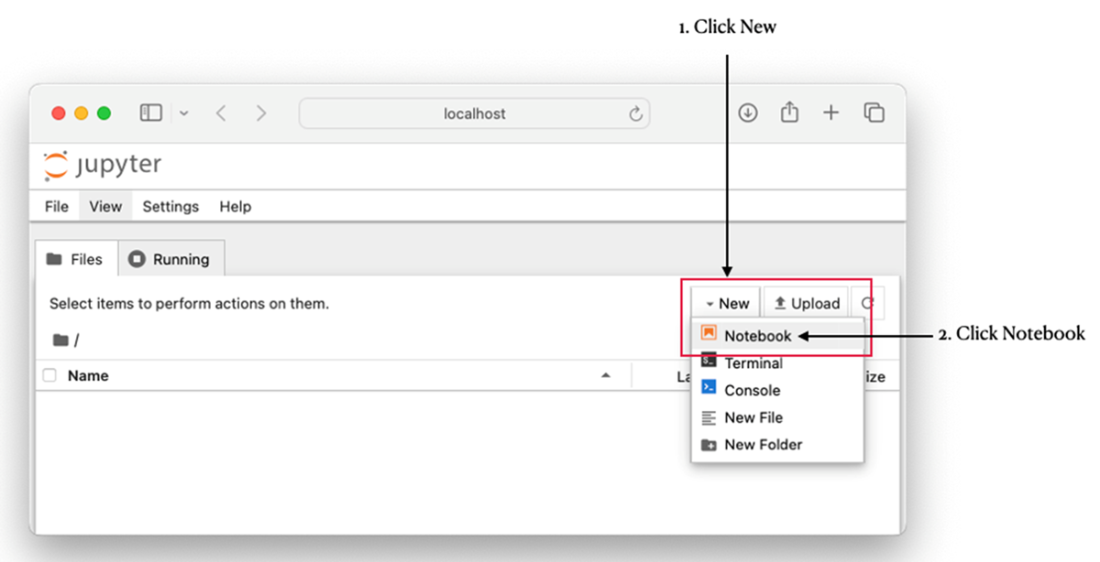
Creating a new notebook
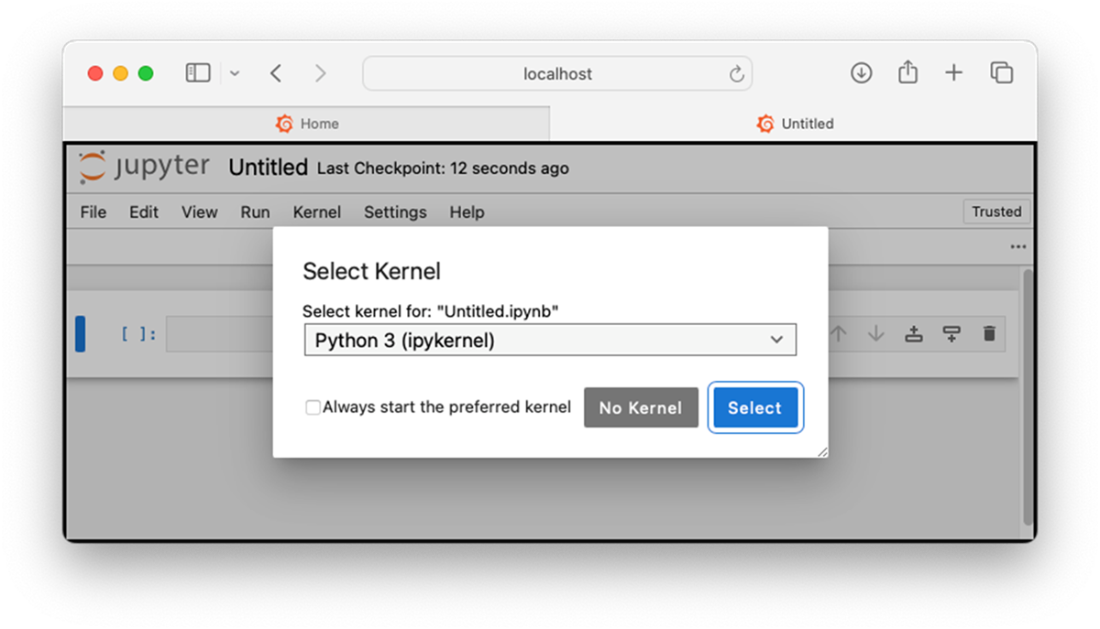
Selecting a kernel for your notebook
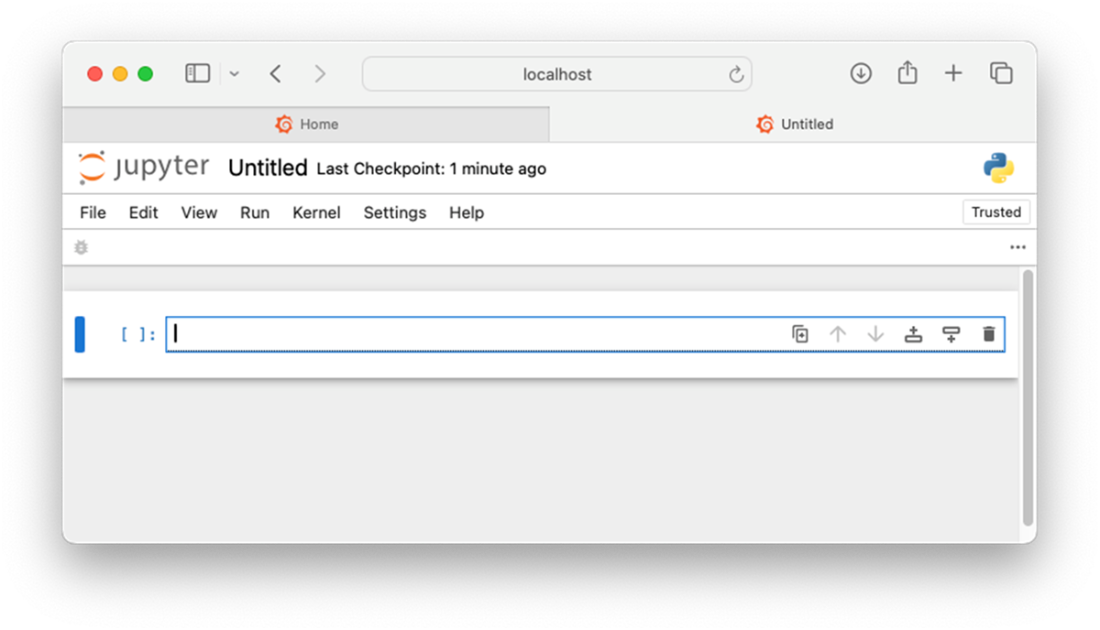
The notebook is now ready to use
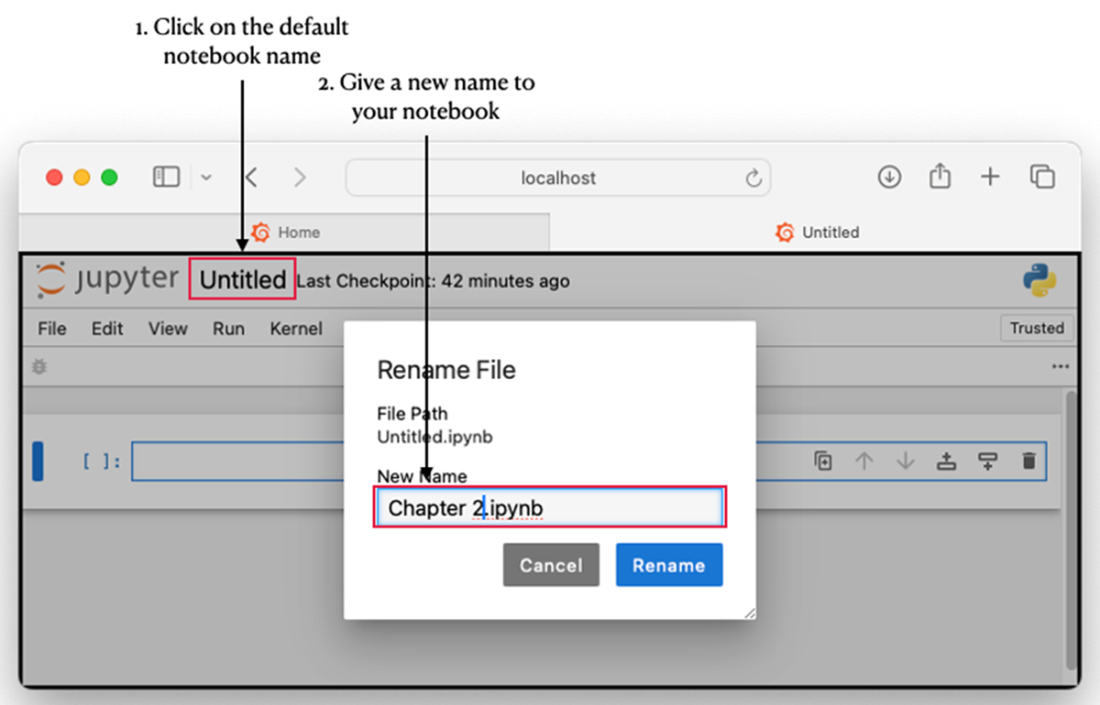
Renaming your notebook
The Hugging Face Hub

Downloading a file directly from a model’s page
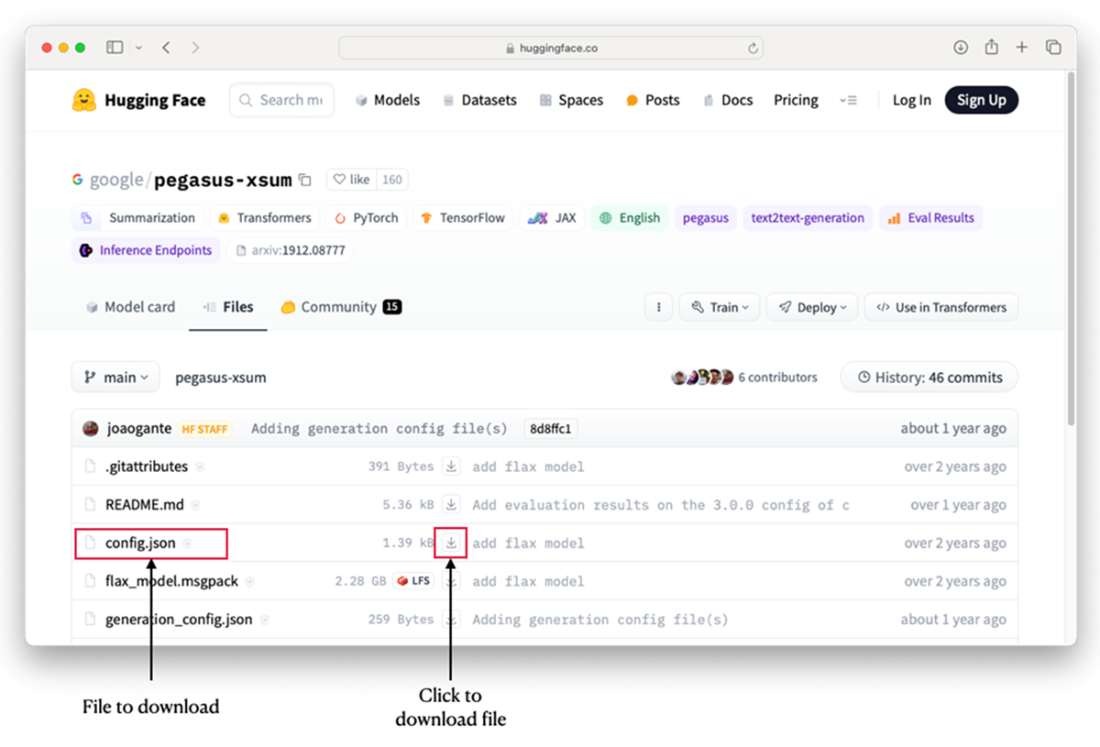
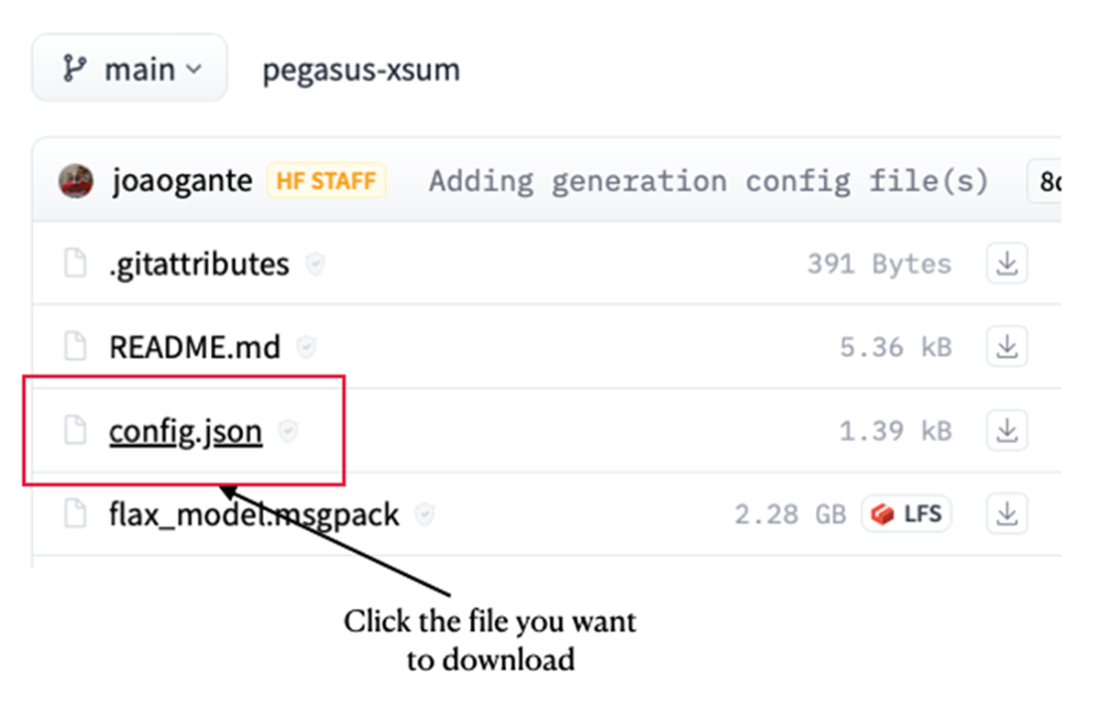
Selecting the file you want to download
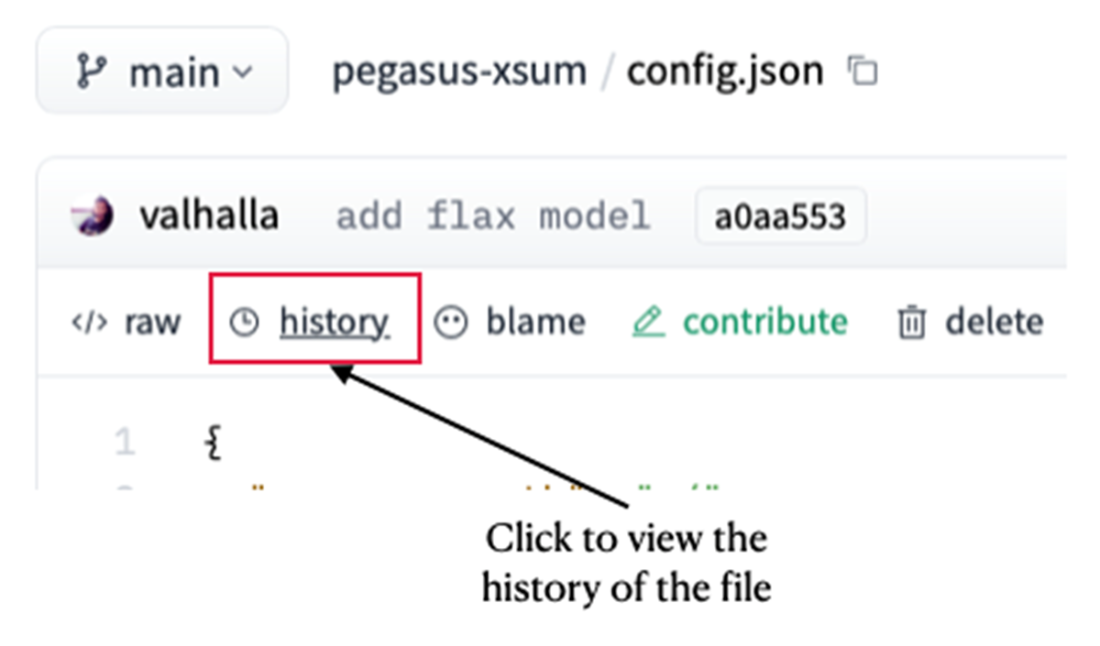
Viewing the historical commits for a project
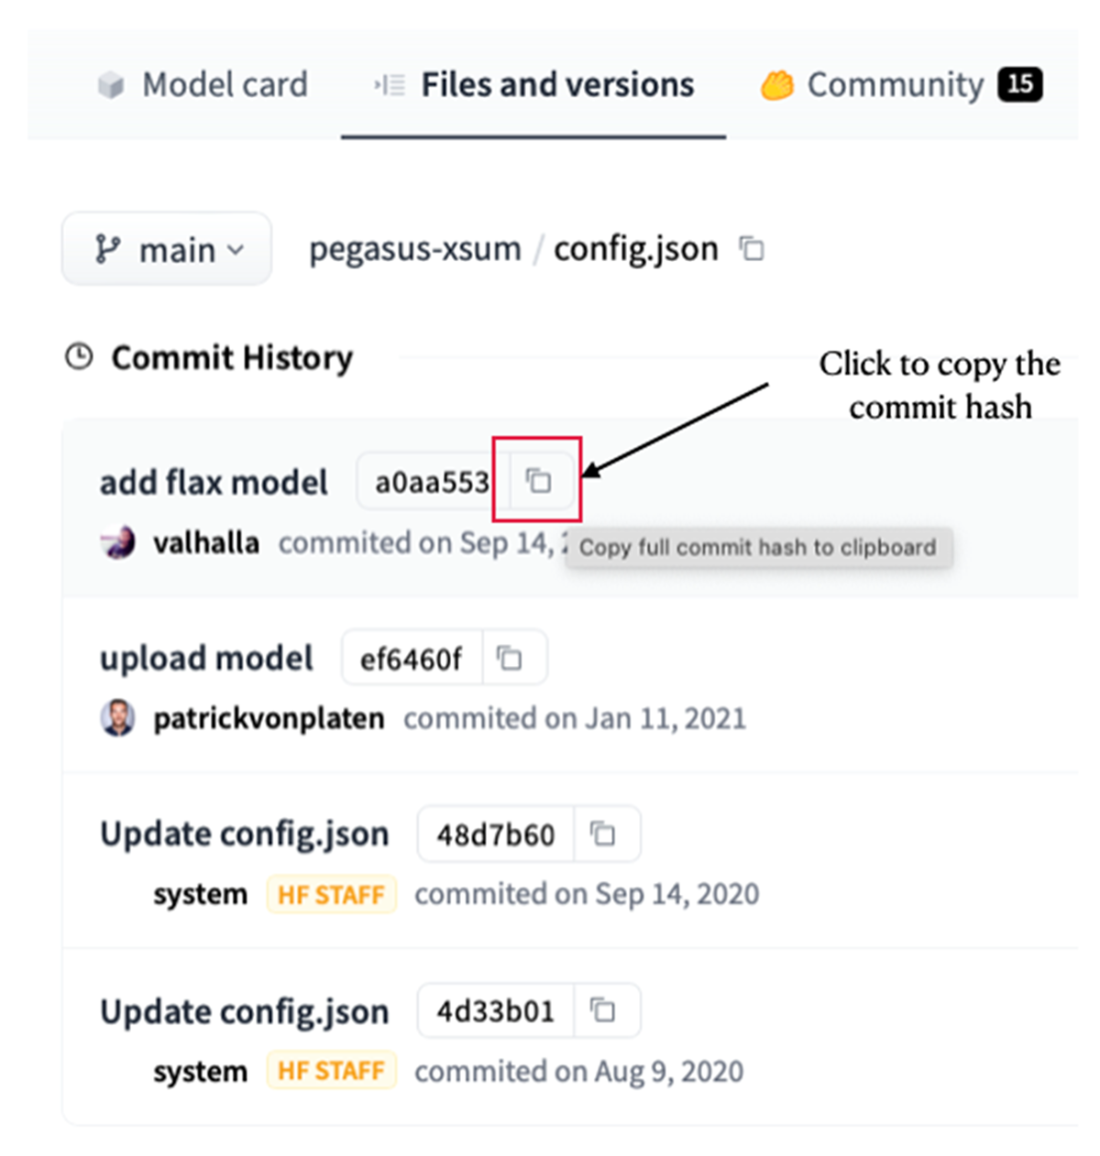
Copying the commit hash for a file
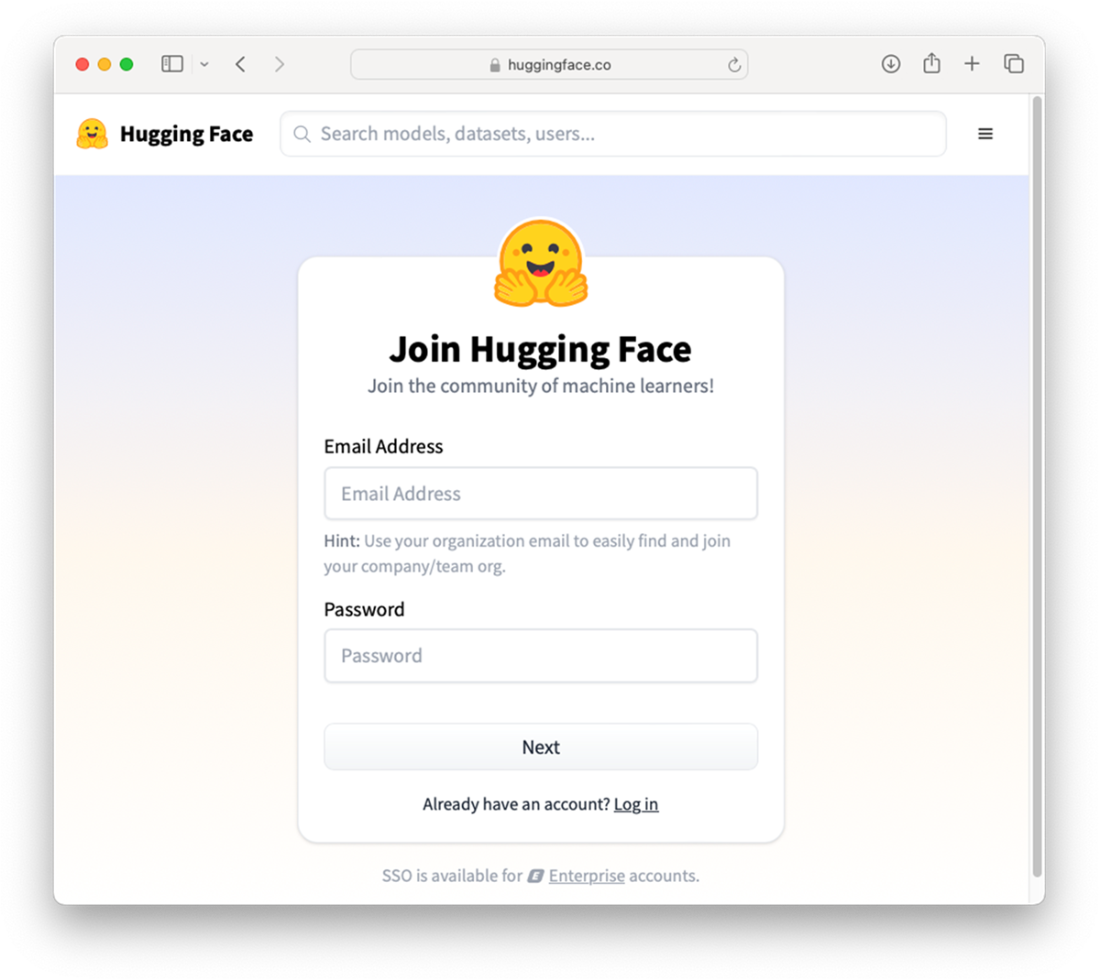
Signing up for a new Hugging Face account
Logging in to Hugging Face Hub from Jupyter Notebook

Summary
- The Anaconda package comes with the conda package manager which simplifies package management and environment creation. It also comes with Jupyter Notebook.
- Creating virtual environments allow you to install and manage Python packages separately from your system-wide Python installation. It's a useful tool for isolating dependencies and managing different project requirements.
- The easiest way to start Jupyter Notebook is to launch it from Terminal (or Anaconda Prompt).
- The Transformers library is primarily built on top of PyTorch, a popular deep learning framework primarily developed by FaceBook’s AI Research Lab (FAIR).
- PyTorch supports GPU, enabling smooth integration with Nvidia's CUDA (Compute Unified Device Architecture), a parallel computing platform and programming model designed for GPUs.
- The Hugging Face Hub package allows you to download files, upload files, as well as perform authentication using the CLI.
FAQ
What’s the easiest way to install Jupyter Notebook for this book?
Download and install Anaconda (free for personal use) from https://www.anaconda.com/download/success. Anaconda includes Jupyter Notebook plus many commonly used data-science packages and the conda package/environment manager.Why create a virtual environment and how do I make one with conda?
A virtual environment isolates dependencies per project. Create one for this book with:conda create -n HuggingFaceBook python=3.11 anacondaWhen prompted, type Y to proceed. This sets up Python 3.11 with the Anaconda distribution inside the environment.
How do I activate the environment and know it’s active?
Activate it with:conda activate HuggingFaceBookYour terminal prompt will be prefixed by the environment name (e.g., (HuggingFaceBook)), indicating it’s active.
On Windows, why use Anaconda Prompt instead of Command Prompt?
Anaconda Prompt is the same shell but with Anaconda’s paths and environment variables preconfigured, so Python, conda, and related tools are ready to use without extra setup.How do I start Jupyter Notebook in a project folder and create a notebook?
1) Create and enter a folder:mkdir HF_Projects cd HF_Projects2) Launch Jupyter:
jupyter notebook3) In the browser, click New → Notebook, choose “Python 3 (ipykernel)”, and rename the notebook as desired.
How do I install the Hugging Face Transformers library?
In a notebook:!pip install transformersOr in Terminal/Anaconda Prompt:
pip install transformers
How do I install a CUDA-enabled PyTorch build and verify GPU availability?
Install GPU wheels (example for CUDA 12.1):pip install torch torchvision torchaudio --index-url https://download.pytorch.org/whl/cu121 -UVerify CUDA:
import torch
print(torch.cuda.is_available())  # True means CUDA is available
How can I inspect GPU details (name, memory, utilization) from Python?
With PyTorch:import torch
if torch.cuda.is_available():
print("__CUDNN VERSION:", torch.backends.cudnn.version())
print("__Number CUDA Devices:", torch.cuda.device_count())
print("__CUDA Device Name:", torch.cuda.get_device_name(0))
print("__CUDA Device Total Memory [GB]:",
torch.cuda.get_device_properties(0).total_memory/1e9)
Optionally, install GPUtil for more stats:
pip install GPUtil
import GPUtil
print(GPUtil.getAvailable())  # e.g., [0]
for gpu in GPUtil.getGPUs():
    print(gpu.id, gpu.name, gpu.load, gpu.memoryUtil, gpu.temperature, gpu.memoryTotal)
How do I run a Transformers pipeline on GPU or Apple Silicon GPU (MPS)?
Pass the device parameter to pipeline(): - First GPU by index:from transformers import pipeline
clf = pipeline("text-classification",
model="huaen/question_detection",
device=0) # or device="cuda:0"
- Apple Silicon (MPS):
clf = pipeline("text-classification",
               model="huaen/question_detection",
               device="mps:0")
Auto-detect best device:
import torch
device = "cuda" if torch.cuda.is_available() else \
         ("mps" if torch.backends.mps.is_available() else "cpu")
clf = pipeline("text-classification", model="huaen/question_detection", device=device)
Check what it’s using:
print(clf.device.type) # "cuda", "mps", or "cpu"
How do I install and use Hugging Face Hub tools (download files, authenticate)?
- Install the Python package:pip install huggingface_hub- Download a file (latest main) from a model repo:
from huggingface_hub import hf_hub_download
hf_hub_download(repo_id="google/pegasus-xsum", filename="config.json")
- Download a specific revision (commit hash/branch/tag):
hf_hub_download("google/pegasus-xsum", "config.json",
                revision="a0aa5531c00f59a32a167b75130805098b046f9c")
- Authenticate via CLI (requires a token from https://huggingface.co/settings/tokens):
huggingface-cli login
huggingface-cli whoami
- Or authenticate in Python:
from huggingface_hub import login
login()
If a widget error appears in Jupyter, update:
pip install -U ipywidgets
 Hugging Face in Action ebook for free